PhotoGenerAI

Image generation & editing

GPT Image 2.6

Create an image from a written brief or upload photos to edit. Choose OpenAI's Flare or Sunburst, set the quality and shape, and download your result.

  • Flare & Sunburst
  • Five quality settings
  • Up to 10 references
  • JPEG download

GPT Image 2.6 uses purchased credits. This page starts with Flare High at 2 credits per image. Check the selected setting before generating.

Optional

What is GPT Image 2.6?

GPT Image 2.6 is OpenAI's image generation and editing family, released on November 4, 2026. It has two variants, Flare and Sunburst. Both accept text and image inputs, so you can create a new image from a description or use uploaded photos to guide an edit. The release also adds API controls for planning and markup-guided edits, plus SVG and animated GIF output. This PhotoGenerAI editor provides the still-image workflow and JPEG downloads. OpenAI release notes.

Flare vs Sunburst: which should you use?

OpenAI positions Flare for interactive iteration and Sunburst for detailed visual work. Start with the task you need to finish. For a poster, check the wording and layout. For a product image, compare its shape and label. The same brief and references make the differences easier to inspect.

Both variants are available in this editor. Their published API token rates and PhotoGenerAI credit settings are the same.
CompareFlareSunburst
OpenAI positioningInteractive iterationDetailed visual work
Start fromText or uploaded imagesText or uploaded images
High in this editor2 purchased credits2 purchased credits
Quality choicesLow, Medium, High, XHigh, MaxLow, Medium, High, XHigh, Max
Download hereJPEG still imageJPEG still image

Already using GPT Image 2? It remains a separate model with its existing Low, Medium and High settings. A shared quality name does not establish equal visual quality across versions. This page gives both new variants their own settings and examples.

Model examples

The same poster brief, two GPT Image 2.6 models

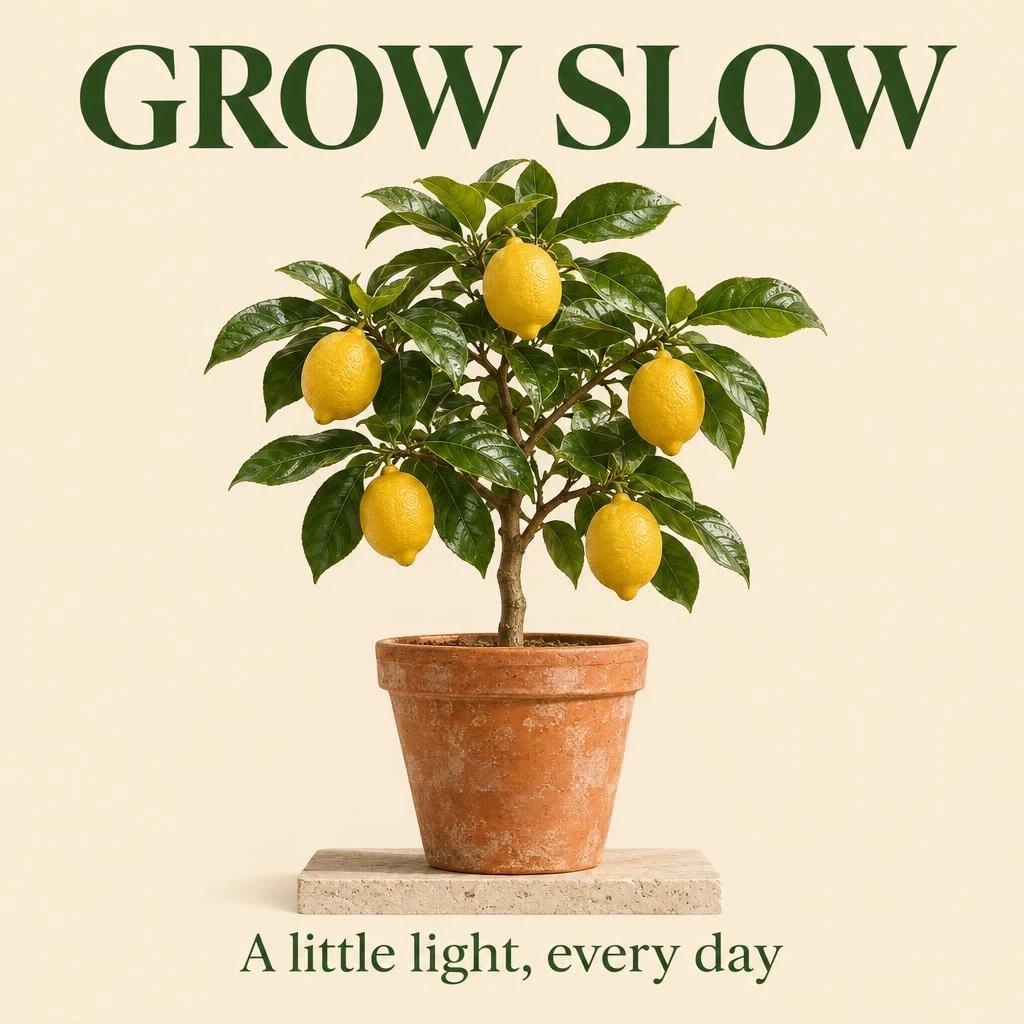
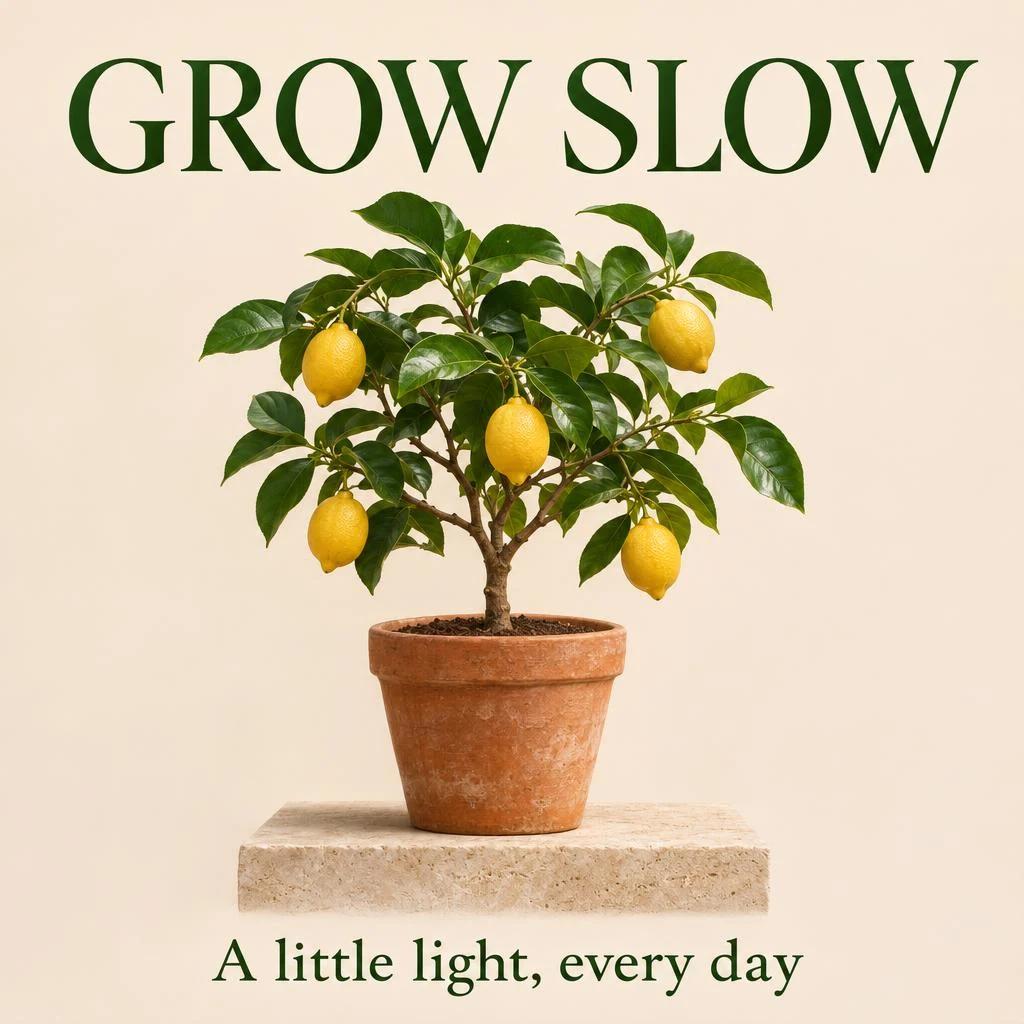
We sent the same prompt to Flare and Sunburst at High quality and 1024 × 1024. These are separate generations. Compare the headline, small subtitle, tree and pot. This small sample set covers one specific brief.

Flare High result for the GROW SLOW botanical poster prompt
Flare · High · 2 purchased credits per generation
Sunburst High result for the same GROW SLOW botanical poster prompt
Sunburst · High · 2 purchased credits per generation

Original prompts, settings and sample provenance

Start with an idea

Three ways to use GPT Image 2.6

Choose a brief, replace the subject with your own, and review the settings before generating. Prompt buttons keep your uploaded images and fill the editor without starting a generation.

01

Create a poster with exact wording

This is the prompt used for the two poster samples. Replace the studio, plant and headline with your own subject. Keep the quoted text short and describe where it belongs. The prompt fills the editor without changing your current model or image shape.

Try this prompt

Create a refined botanical poster for a neighborhood plant studio. Center a small lemon tree with five yellow lemons and glossy dark-green leaves in a terracotta pot on a warm cream background. The pot rests on a pale stone plinth with a soft contact shadow. At the top, write exactly "GROW SLOW" in large dark-green serif lettering. Below the tree, write exactly "A little light, every day" in a smaller legible line. Give the words generous space and keep the tree below the headline. Photographic leaves and ceramic texture, restrained editorial layout, square composition. No other words, logos or watermarks.
02

Revise an image without starting over

Upload the first poster sample or your own design, then name the changes and the details to retain. Our editing examples below use this instruction with the same input. Review the original and result together, especially small text and the subject's outline.

Try this prompt

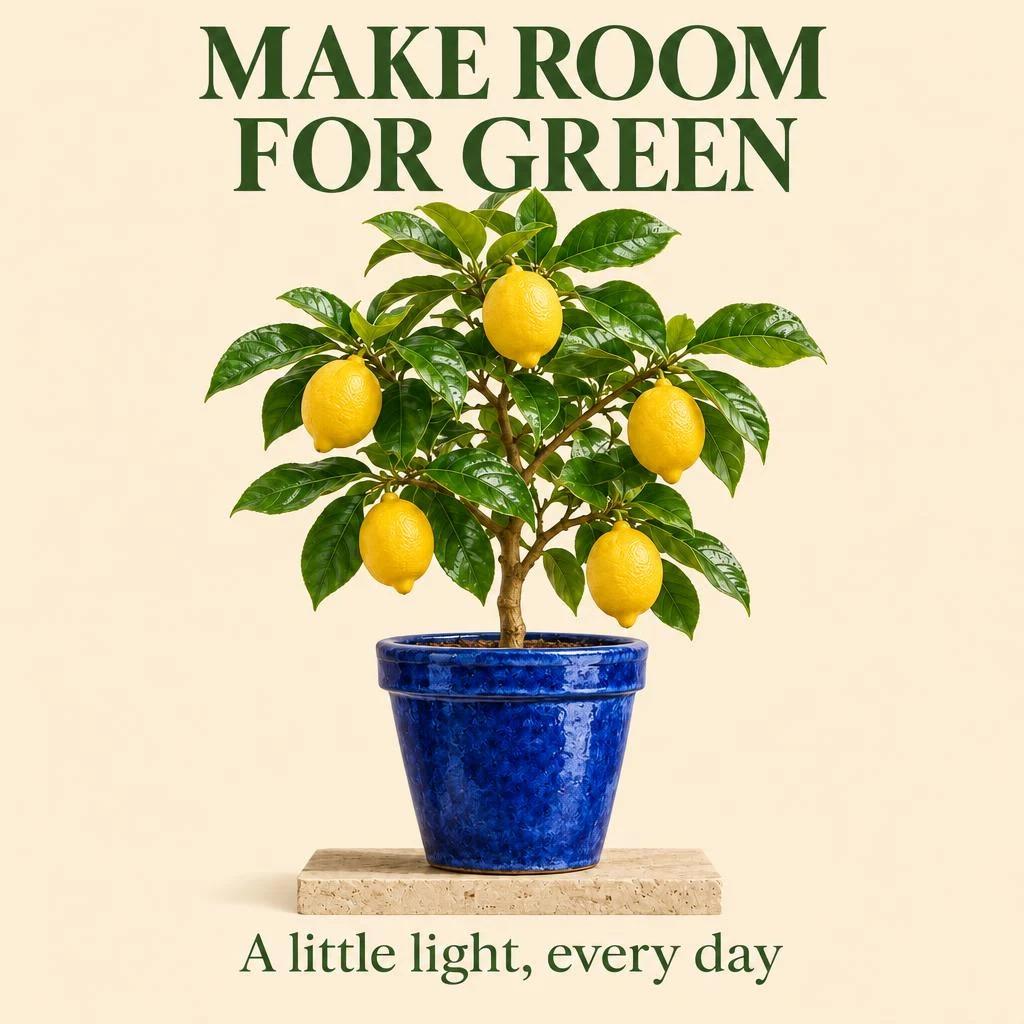
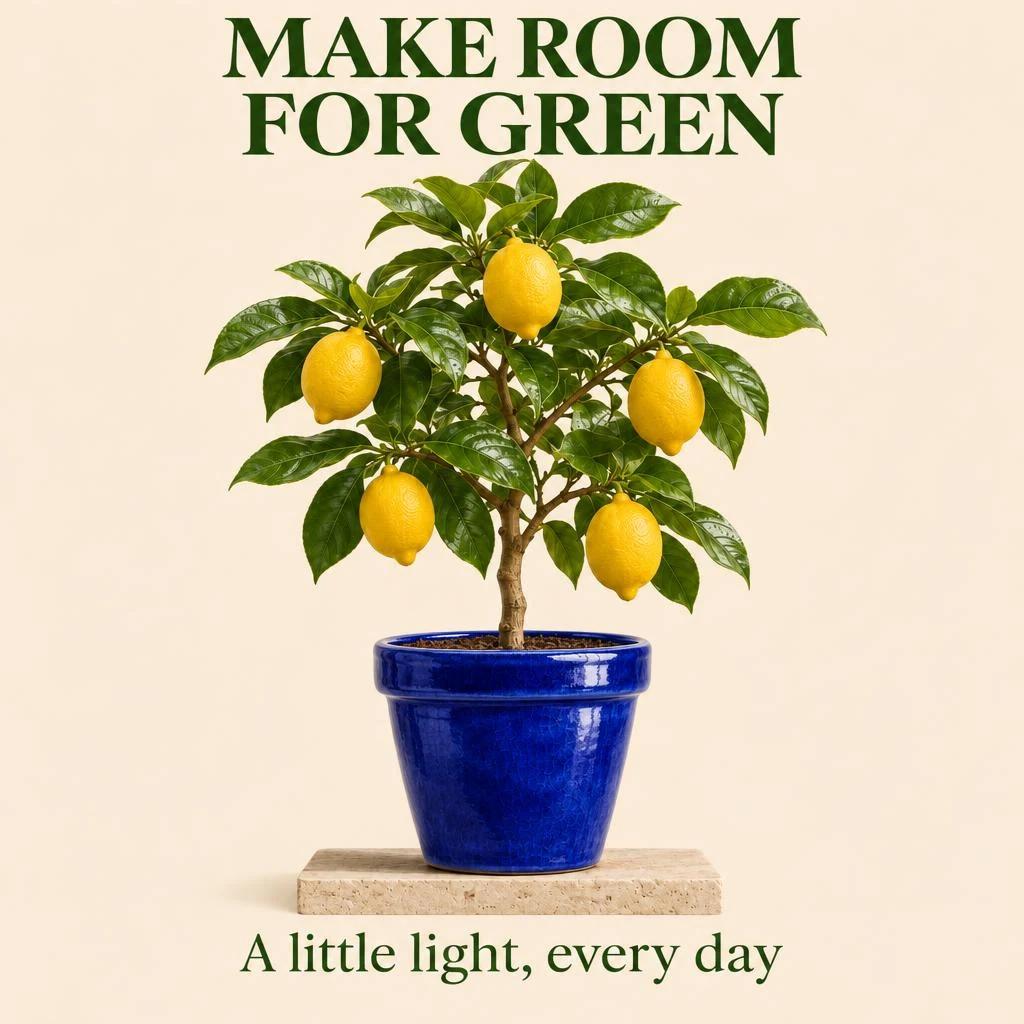
Edit the supplied botanical poster. Change only the terracotta pot to cobalt-blue glazed ceramic and replace the top headline with exactly "MAKE ROOM FOR GREEN". Keep the lemon tree, five lemons, stone plinth, cream background, subtitle "A little light, every day", lighting and overall layout. Fit the new headline above the tree in two balanced lines. No other words or logos.

03

Build a product photograph from references

Use the first reference for your product and an optional second image for the setting. Describe their roles in the brief. Adapt this starting point and check the final product shape and label at full size.

Try this prompt

Create a realistic product photograph. Use image 1 as the product reference and keep its bottle shape, label wording, cap and color. If image 2 is provided, use it only for the background palette. Place the product on pale limestone beside a small green leaf, with soft morning light from the left and a believable contact shadow. Keep the label facing the camera and leave empty space on the right for a later caption. Do not add words or change the brand label.

Create your first GPT Image 2.6 image

  1. 01

    Write a brief or add your photos

    Describe the subject, composition and exact wording for a new image. For an edit, upload the original and state what to change. Give each extra reference a clear job, such as a product, background or palette. You can use up to ten images in total.

  2. 02

    Choose the variant and settings

    Switch between Flare and Sunburst in the model selector. This page initially selects Flare High and a square shape. Choose another quality or ratio when your brief needs it. Both variants use the same credit table, and the quality selector shows the current amount.

  3. 03

    Generate, inspect and download

    Open the result at full size to inspect text and fine details, then download the JPEG. Continue editing brings the result back into the workspace for a focused revision. Each generation or edit is a separate request using the selected model and credits.

GPT Image 2.6 settings and credits

Both Flare and Sunburst use these PhotoGenerAI credits. All five settings require purchased credits. Quality controls rendering detail; image shape controls the requested dimensions. Square requests 1024 × 1024 here. Higher quality does not automatically select a 2K or 4K size. Your current configuration and price are shown before generation.

GPT Image 2.6 generation settings in PhotoGenerAI
SettingCredits per imageCredit access
low1Purchased credits
medium2Purchased credits
high2Purchased credits
xhigh4Purchased credits
max8Purchased credits

Compare another model with your own brief: GPT Image 2, Nano Banana 2, or Qwen Image 2.1 Turbo. The model selector keeps your prompt and references while updating the available settings and credit amount.

A focused edit, with the original kept in view

Both models received the Flare poster below and the same request: change the pot to cobalt blue, replace the headline, and retain the tree, subtitle and setting. All three images are shown in full.

Input: the original Flare High poster
Flare High edit
Flare High edit
Sunburst High edit
Sunburst High edit

Both outputs have the new headline and a blue pot. In this pair, Flare retained more of the pot's weathered surface, while Sunburst changed its rim and profile. That is a useful detail to check when an object's shape matters. These are two individual edits of one input, not a general preservation score. Read the complete prompts and generation settings.

How API output estimates compare with Image 2

The credit table above is what you spend in PhotoGenerAI. OpenAI's API uses token billing instead. For Standard processing, Image 2 and both 2.6 variants share rates of $5 per million text-input tokens, $8 per million image-input tokens and $30 per million image-output tokens. Their output token counts differ, so equal token prices do not mean equal costs per image. Official API pricing.

USD per image output, 1024 × 1024, Standard processing. Official calculator estimates checked November 14, 2026. Prompt and reference-image inputs are additional.
Quality parameterImage 2Either Image 2.6 variant
Low$0.00588$0.02469
Medium$0.05268$0.04347
High$0.21072$0.05268
XHighNot supported$0.09366
MaxNot supported$0.21072

At this size, 2.6 Low has about 4.2 times the output charge of Image 2 Low. New High matches old Medium's output estimate, and new Max matches old High. Those are cost relationships, not proof of equal picture quality. Reference images, prompt length and the chosen dimensions affect the complete request. Auto dimensions can change this estimate. Use OpenAI's image cost calculator.

In our four High sample requests, the two text generations cost about $0.0534 each and the single-reference edits about $0.0616 each. These recorded totals include inputs and describe this small sample, rather than a fixed price per request. Inspect the original files, prompts and cost receipts.

What independent evaluations show

Public evaluations provide context for the model family. The quality setting and test population matter: these two leaderboards use different settings, and neither result below measures this page's High preset.

Observed leaderboard snapshots. Rankings can change as models and votes are added.
EvaluatorTested settingObserved result
Artificial AnalysisMaxSunburst #1, Flare #3. November 14, 2026.
ArenaMediumSunburst #2, Flare #4. Preliminary entries, November 12, 2026.

Artificial Analysis uses blind, same-prompt comparisons and human preference ratings for its English-prompt image benchmark. Its methodology describes the evaluator pool and scoring. A leaderboard rank does not predict whether your product label, face or layout will be correct. Use the samples here to inspect specific outputs, then compare your own brief when those details determine whether you can use the image.

OpenAI's generation guide documents the wider API capabilities, including SVG, animated GIF and markup-guided editing. This page currently provides still images, natural-language reference edits and JPEG downloads.

Quality and complexity do different jobs

Low, Medium, High, XHigh and Max are rendering-quality settings. Pick a setting for the detail that matters to your image, such as lettering, leaf edges or a product's material. First settle the subject and layout, then compare a more detailed setting if the result needs it. A quality change creates a new generation and can also change the composition.

OpenAI's API has a separate complexity setting that controls planning before rendering. Its default is High. Greater planning can help dense text and relationships between objects, but can also add time or change details you wanted to retain. This browser editor exposes model, quality and shape; it uses the model's default complexity. A request for High quality does not mean that the two settings are the same control.

Give each reference a specific role

Put the main subject or image to edit first. Explain what additional pictures contribute, for example, the first image is the bottle, the second supplies the background and the third supplies the colors. A reference without an assigned role leaves more of the choice to the model. For a product listing, name the shape, label and material that matter before describing the new setting.

Keep a useful version before making the next revision. Ask for one focused change and compare the result with the original at full size. Check the label, edges, proportions and any face you wanted to retain. Generative editing can redraw unmentioned areas. More quality or a longer prompt does not turn it into a pixel lock or an editable layered file.

Make lettering and layout easy to check

Put the exact words in quotation marks, then describe their size and placement. State which text is the headline and which line is secondary. Leave enough space for both. For a poster, choose the intended aspect ratio before generating so the composition has room for the subject and words. Read names, dates and numbers at full size before publishing the result.

If the headline is wrong, upload the useful version and request a targeted correction. Retain the subject, background and layout in the instruction, then check those details again. When the final wording must remain editable, generate the artwork here and add the final text in your design application. The downloaded JPEG contains the finished pixels, not separate text layers.

Read OpenAI's GPT Image 2.6 prompting guide for the model's capabilities. Explore our AI photo generator for the shared workspace, or use the AI photo editor when your next task starts with an existing photograph.

GPT Image 2.6 FAQ

PhotoGenerAI

Put your idea into an image

Start with a prompt or your own references. Check the selected model and settings, then make your next image.

Create with GPT Image 2.6