
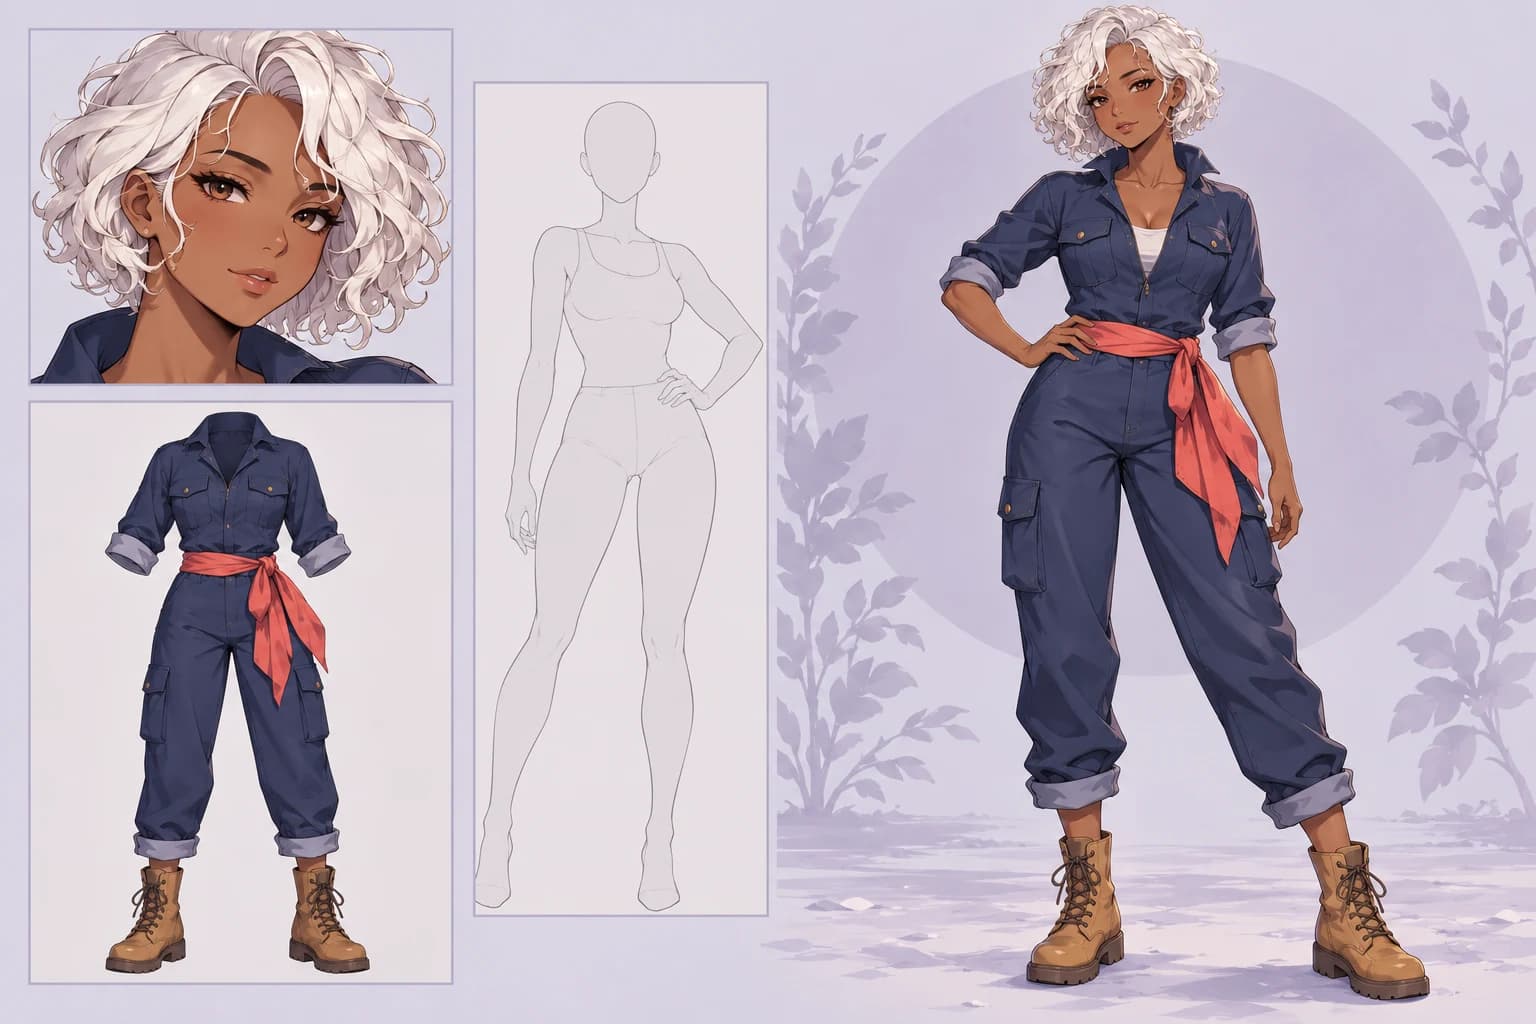
Meet the original anime character gallery
キャラ組み立てDB by たき AI (@taki_auto) is a visual library for choosing character features before writing a prompt. Its public collection contains 1,027 entries: 306 hair, head and eye references, 440 outfits and 281 poses. Hair color variants sit behind color choices, so the number of visible main cards is smaller.
The original site has separate hair, outfit and pose tabs, search, favorites and a character assembler. Select a card to inspect its image and Danbooru tags. Clothing and pose tags describe that part, rather than asking you to keep the example character’s entire appearance.
This is a different creator and collection from ギア’s COSTUME-DB-01 and POSE-DB-01. PhotoGenerAI links the library as a source of references; the author runs the gallery independently.
Choose tags or save a reference image
In the original gallery, add selections to the assembler’s hair, bangs, hair color, accessory, eyes, outfit and pose slots. Choose an expression, framing and background, then copy the positive prompt, negative prompt or both. The eyes slot holds one choice, so check the resulting text if you need both a particular eye shape and color.
The assembler offers templates for several tag-based image models. Use the template that belongs to your own generation environment. A copied template does not switch PhotoGenerAI to Illustrious, NovelAI or Pony, and negative text is not a separate negative-prompt control here.
For an image-led workflow, open a card’s full image and save it with your browser. The public color references currently use JPG files. Pose cards also offer PNG line drawings. A line drawing can act as a visual reference here; PhotoGenerAI does not expose ControlNet lineart or canny settings.
Chinese search and numbered reference boards
SleepyZone’s Chinese interface translates the browsing interface and supports Chinese, Japanese and tag searches. It also adds a reference-board export: choose the parts, enter the assembly tab, then download or copy the numbered board. This export belongs to the Chinese interface; the original site assembles prompt text.
A board lets you point to several design choices in one upload. Keep the panels legible and note their numbers: for example, “use the hair from panel 1, clothing from panel 2 and pose from panel 3.” You can also use your own images in a board. A single clear reference is enough when you only want one change.
The author’s current terms limit the gallery pictures to reference use and prohibit reposting, redistributing or reselling the pictures themselves, including placing them directly into work for sale. They also restrict uses involving real people or minors. Read the original site’s usage instructions before using a reference. A public GitHub interface does not grant a new license to its source images.
Upload your references and create a character
Open the AI anime character creator. Upload one image in Design reference or board. For a new character, leave Existing character empty. To edit a design you already have, upload that character in the optional field.
Use the instructions to give each part a job. Specify the hair and eye details to adopt, the outfit to wear and the pose to follow. If a board contains several people, explain which panels supply design details and ask for one finished character. If you supplied an existing character, name the identity details to keep.
Choose the model and image shape in settings. Review the credit cost on Generate character, then start generation. Uploading a reference or changing the instructions does not start it automatically. The original gallery, Chinese interface and PhotoGenerAI have separate uploads; save the reference first, then upload it here.
Create from your referencesA starting prompt you can copy
This is the tool’s starting instruction. Add your panel numbers and concrete choices after it. For example: “Use panel 1’s white curls and brown eyes, panel 2’s navy jumpsuit and coral sash, and panel 3’s hand-on-hip pose. Show the whole adult character, including the boots.”
Prompt to try
Create one original adult anime character using the design reference image or board. Combine the chosen hair, eyes, clothing and pose into one coherent character, not a collage. With one uploaded image, it is the design reference. With two uploaded images, image 1 is the existing character to preserve and image 2 is the design reference. Keep the existing character's identity and illustration style except for the changes I explicitly request. Follow my panel assignments and omit any reference labels, borders and extra figures. Use a simple background.
Keep tag lists short enough to understand. When a tag conflicts with an image, resolve the conflict in words: “Keep the existing character’s blue eyes; take only the hairstyle from the board.” Removing an unwanted reference is often clearer than adding more competing instructions.
Check the design, then keep what works
Compare the result with the reference. Check the hair silhouette, eye color, clothing layers, pose and hands. A coherent character matters more than reproducing every small detail at once. If the output is still a collage, explicitly ask for one full-body character and remove panel frames, labels and extra figures.
Choose Continue editing to put the result in Existing character. The design board stays in its reference field. Keep the identity instructions and change the part you want to revise, or replace the board with a new reference. The text draft and images stay available when you visit this guide and return in the same tab.
Fixed hair, eye and body descriptions help communicate continuity, but they do not lock identity inside an image model. Inspect each result before downloading it. Keep a character image you like as the visual anchor for the next edit.
Choose the next edit for your character
Use the character outfit changer when the identity is settled and you only want another costume. Use the AI pose generator for a new body position. The costume gallery guide and pose gallery guide explain those separate reference collections.
For a scene described entirely in words, try the anime AI image generator. To combine other subjects and references, return to the AI photo generator.